Edit Projects
In this article, you’ll learn how to add and remove pages from your SCOUT projects, as well as how to include various types of content to customize your project. If you're new to SCOUT, check out this article to learn what projects are and how to create them.
Add thumbnail and description
Thumbnails and descriptions are valuable additions to your SCOUT projects, helping you identify them quickly and enhance their appearance in reports. Here's how you can add them:
- Open your Project
- Click on the Edit button in the top right corner of the screen.
- To change the description, click on the text below the title, and add your own.
- To add a thumbnail, click on the image, select a file and upload. Note: Minimum Resolution should be 512 x 512 px.
You can also AI-generate your project thumbnails. Just click on the magic wand in the pop-up icon.
You can also customize the AI’s image prompt:- Hover over the magic wand
- A new icon will appear
- Click the icon and edit the prompt
- To save your changes, click on the green button in the top right corner of the screen.
Add pages and subpages
On the left hand side of your project, you can see the outline (pages and subpages) of your project.
- Add subpages to your main project page by right clicking on your SCOUT project’s main page.
- You can also add further pages to each SCOUT Project subpage. Adding a subpage to a page will copy that page’s query into it. However, each page is assigned an individual query. If you edit the query of that specific page, it will not affect the other pages.
Add and edit content
SCOUT Projects always open in ‘read only’ to avoid accidental edits.
- To start editing, click on the blue icon on the upper right part of the page.
- To save your changes, click on the green icon.
- To discard your changes, click on the red icon.
Types of content
SCOUT allows you to enrich your projects with a variety of content types, ranging from real-time, data-driven insights to custom elements you create yourself. Below, we’ve outlined the different possibilities and how you can use them effectively.
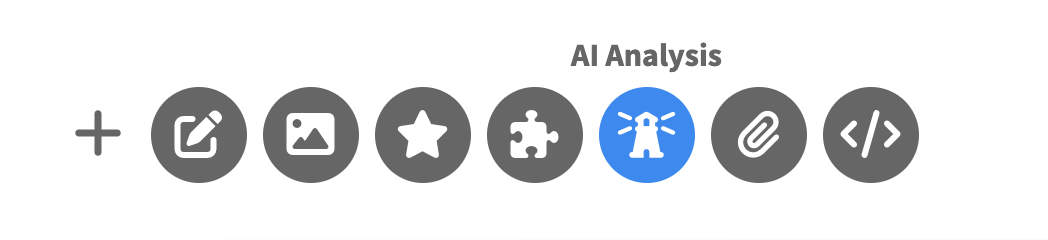
When in editing mode, simply click on one of the icons to add content.
Panels
Add any panel from SCOUT to your project. Just click on the panel button and choose the panel you want to integrate.
AI Analysis
Select the AI analysis from the SCOUT Assistant you want to add without loading any panel.
Bookmarks
Bookmarking in SCOUT helps you save specific items for quick access and future reference. You can bookmark items directly from a panel in your project or from the Search Hub.
- Select the items you want to bookmark by clicking the checkbox next to the item in rankings or the publication in reference lists.
- Click on Bookmark at the bottom of the screen.
- Choose to which page you will save your bookmarks.
- Add your bookmark to the project.
- Click on the Star button. If there are bookmarks saved to that page, the star icon will be highlighted in blue.
- Select the panel for which you have saved bookmarks. Panels with existing bookmarks will display a star.
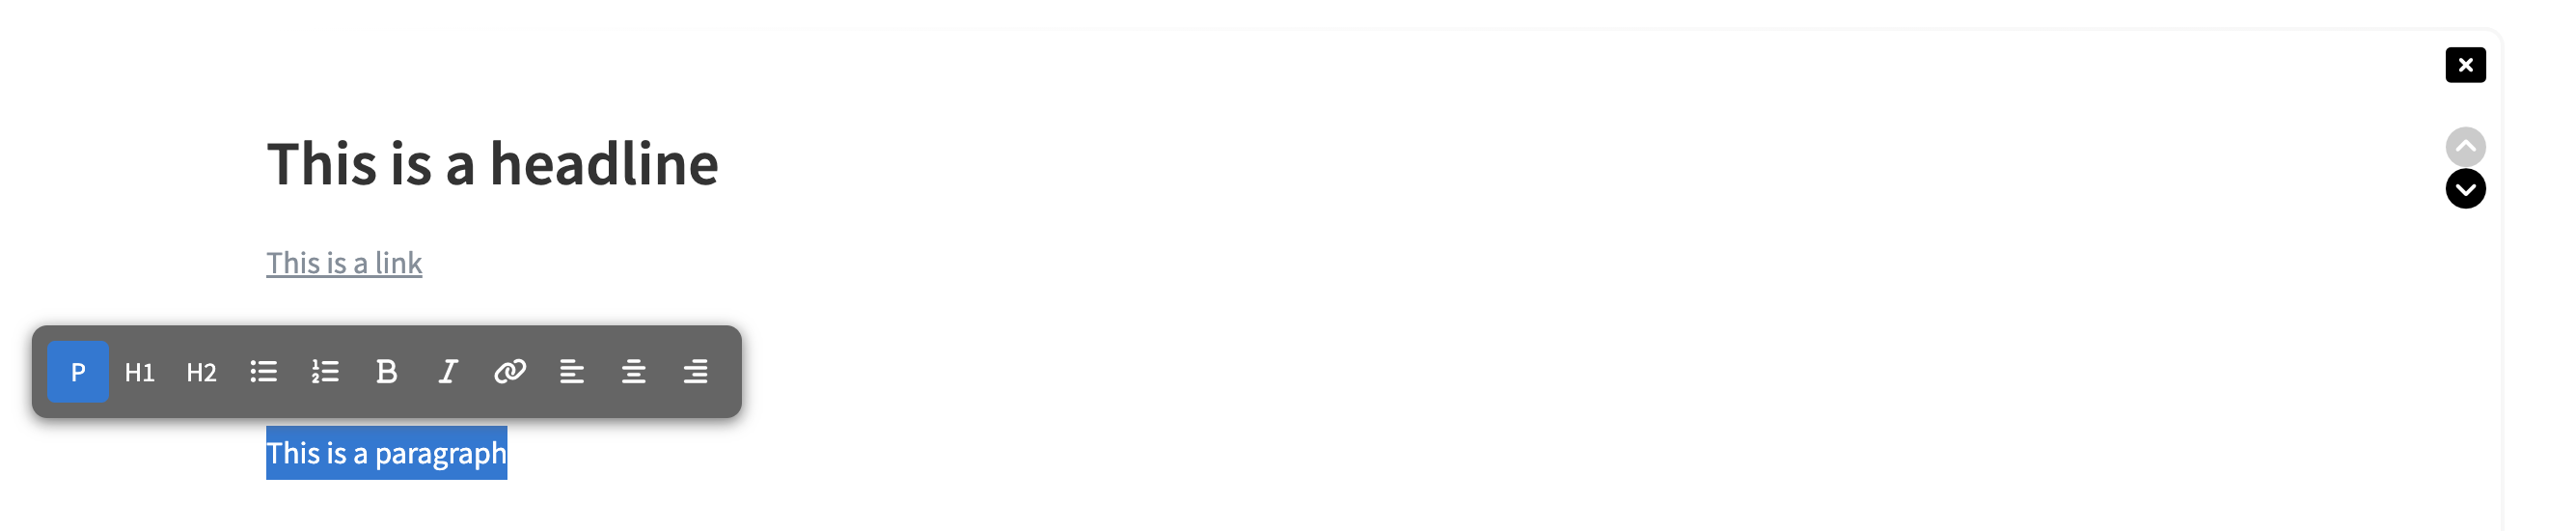
Text
Clicking the Text icon opens a floating formatting toolbar. From here, you can apply common text formatting options such as bold, italic, and underline, adjust heading styles (H1/H2), change alignment, add links, create lists, and insert tables.

Iframes
Insert content from Google services (Spreadsheets, documents, charts, YouTube videos, etc.) and up-to-date financial data (e.g. Stockdio). You can find the Iframe URL in the src attribute of the embed code that you get from your iframe provider.
Call to actions
If you add a link to a heading or subheading, this will be turned into a CTA button.
Images
Click on the image icon to upload images.
Attachments
Add attachments to your SCOUT project, by clicking on the attachments button.